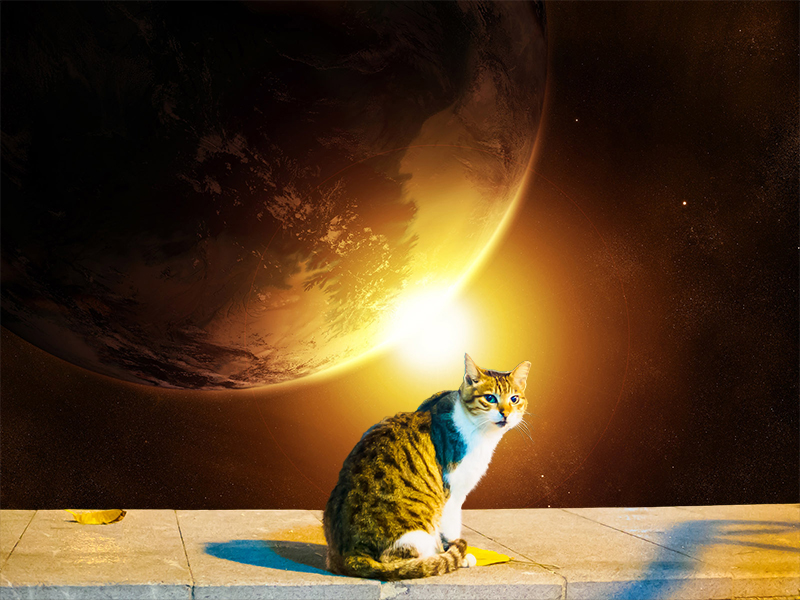
Lab 4 (Unused)

Roosevelt arch gateway, earth from space inside gateway
Click the image to see a before and after.

Gateway to Earth

Masking

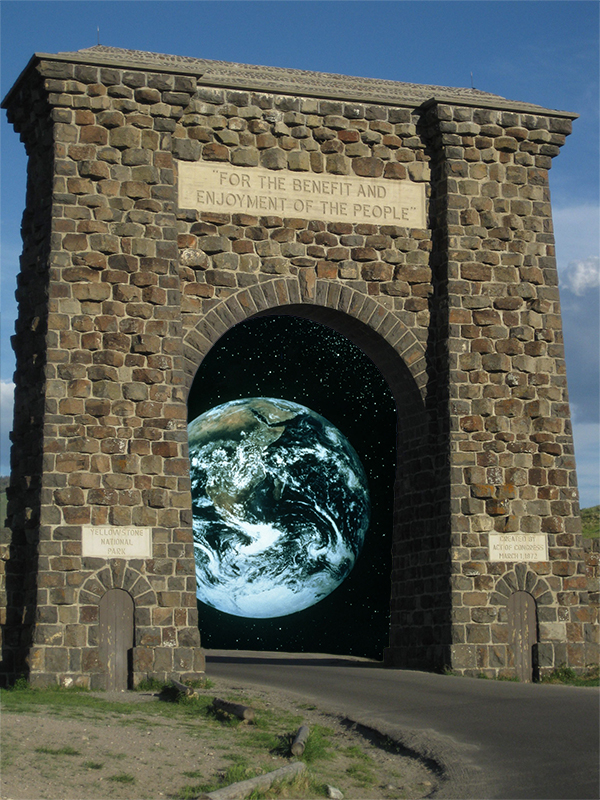
This was my original attempt at Lab 4, but I was unsatisfied with the result and started over with a different pair of images. I wanted to keep this image and make a page for it to show that not everything works out how you want it to, and you can only improve if you keep putting in an active effort.

I chose an image of the Roosevelt Arch in Yellowstone National Park because I wanted an arch where I could easily mask out its interior. I also liked the quote, "For the Benefit and Enjoyment of the People". For the second image I chose an image of Earth in space to imply a kind of magical portal to another world.

I tried a couple of various inner arch images; different galaxies, nebulas, and other NASA photos, like what's seen in the banner at the top of the page, but I liked this Earth photo the most. I tried various framings of Earth, but nothing looked all that good to me. There was also noticable artifacting/feathering around the mask, like what you'd see on a cheap green screen effect, and I didn't like that either. Even though I didn't submit this, I took the techniques I learned and the general theme of this project and used those on the lab that I did submit.

Detailed Steps
  1. Open the first image file (gate).
  2. Click and drag the same image file (gate) from your computer's folder and drop it onto the canvas area to add as a second layer.
  3. In the bottom right Layers area, click the eye icon next to the "Background" gate thumbnail to hide the layer.
  4. In the left toolbar click Object Selection Tool.
  5. Click the sky, then hold Shift and click the mountain to select both the sky and the mountain.
  6. Right click > Select Inverse
  7. Click the layer mask icon on the bottom right.
  8. Press B for the Brush Tool, and press X to invert the palette (white over black).
  9. In the top toolbar click the dropdown arrow by the circle icon (brush size), and change the Size to 200 px.
  10. Paint around the edges of the gate.
  11. Hold Alt and click the layer mask thumbnail next to the gate layer.
  12. Use the paintbrush to clean up the edges more precisely.
  13. Press X to invert the palette (black over white).
  14. Click the brush size dropdown arrow and change the Size to 50 px and Hardness to 50%.
  15. Ctrl++ to zoom in on the gate entrance.
  16. While still viewing the black and white layer mask, use the paint brush to clean up the black area of the gate entrance.
  17. Hold Alt and click the layer mask thumbnail next to the gate layer to go back to the original view.
  18. Click and drag the second image (Earth) onto the canvas.
  19. In the bottom right Layers area, click and drag the Earth layer below the masked gate layer.
  20. Press V for the Move Tool and move the Earth image down 67 px and left 79 px.
  21. Alt+Ctrl+I to open the Image Size property.
  22. Keep Width/Height locked. Change units to pixels. Change Height to 800 px.
  23. Shift+Ctrl+S to Save As a Photoshop file (.psd).
  24. In the top bar: File > Export > Export As
  25. Change the format to JPG. Click Export.

— Gallery —