Lab 4

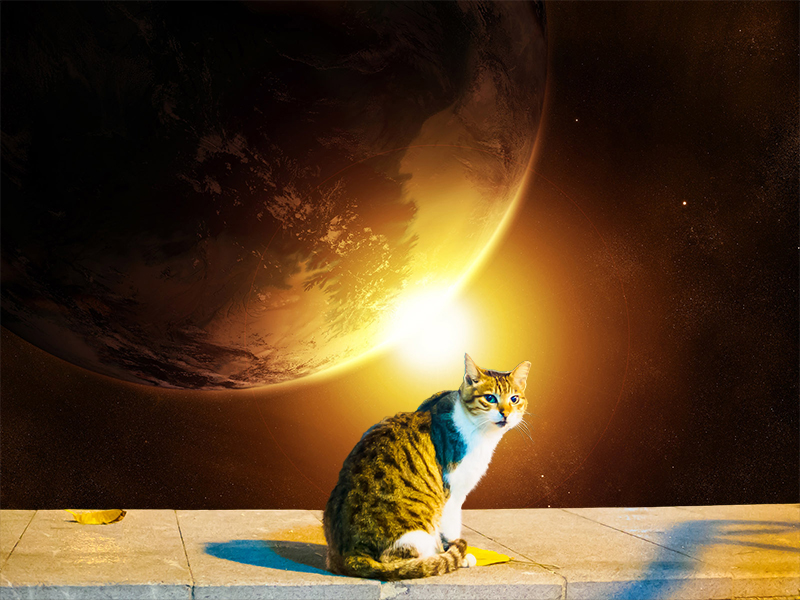
cat sitting on ledge, earth from space in background
Click the image to see a before and after.

Space Cat

Masking

The assignment for this lab was to create a mask on an image to cover or show another image. The specific requirement for this lab was to refine the edges to make them smooth.

I chose an image of a cat on a ledge so I could easily mask out the background. The cat image had a warm yellow light, so for the second image I chose a space picture with a similar warm yellow light.

The space image originally had the planet in the top right, but I wanted to flip it vertically so the image would "flow" better. With the planet in the top left, it would be in the space the cat would be looking at if it turned its head, and the curve of the planet would arch along the curve of the cat's back, rather than "push" against the cat's head if the planet were in the top right. With the flipped background the image would be "read" top-left to bottom-right, with the eye starting at the planet and moving towards the cat, then the blue shadow on the ledge, maintaining focus on the sunlight in the center of the frame, which keeps the viewer focused on the main subject of the cat.
Detailed Steps
  1. Open the first image file (cat).
  2. Click and drag the same image file (cat) from your computer's folder and drop it onto the canvas area to add as a second layer.
  3. In the bottom right Layers area, click the eye icon next to the "Background" cat thumbnail to hide the layer.
  4. Click and drag the second image (space) onto the canvas.
  5. Click the leftmost arrows icon in the bottom toolbar to flip the space image horizontally, and click Done.
  6. In the bottom right Layers area, click and drag the space layer below the visible cat layer.
  7. Click the topmost visible cat layer in the bottom right Layers area.
  8. In the left toolbar click the Object Selection Tool.
  9. Click the cat, then hold Shift and click the concrete ledge to select both the cat and the ledge.
  10. Click the layer mask icon on the bottom right.
  11. Hold Alt and click the layer mask thumbnail next to the cat layer.
  12. Press B for the Brush Tool, and press X to invert the palette (white over black).
  13. Ctrl++ to zoom in on the ledge.
  14. Broadly paint out the black and gray areas on the white ledge.
  15. In the top toolbar click the dropdown arrow by the circle icon (brush size), and change the Size to 20 px.
  16. Use the paint brush to clean up the edges more precisely.
  17. Hold Alt and click the layer mask thumbnail next to the cat layer to go back to the original view.
  18. In the top bar: Select > Select and Mask
  19. Click the Refine Edge Brush Tool on the left toolbar, and change the brush Size to 30 px and the Hardness to 50%.
  20. Paint around the cat's whiskers and white part of the fur on the right side.
  21. Change Shift Edge to -30%, and click OK.
  22. Press C for the Crop Tool, and click and drag the edges of the cat image to align them with the edges of the space image.
  23. Click Done.
  24. Alt+Ctrl+I to open the Image Size property.
  25. Keep Width/Height locked. Change units to pixels. Change Width to 800 px.
  26. Shift+Ctrl+S to Save As a Photoshop file (.psd).
  27. In the top bar: File > Export > Export As
  28. Change the format to JPG. Click Export.

— Gallery —