Lab 2-A

trekking 4 1 1 magazine, hiker silhouette
Click the image to see a before and after.

Trekking 411

Layer Styles

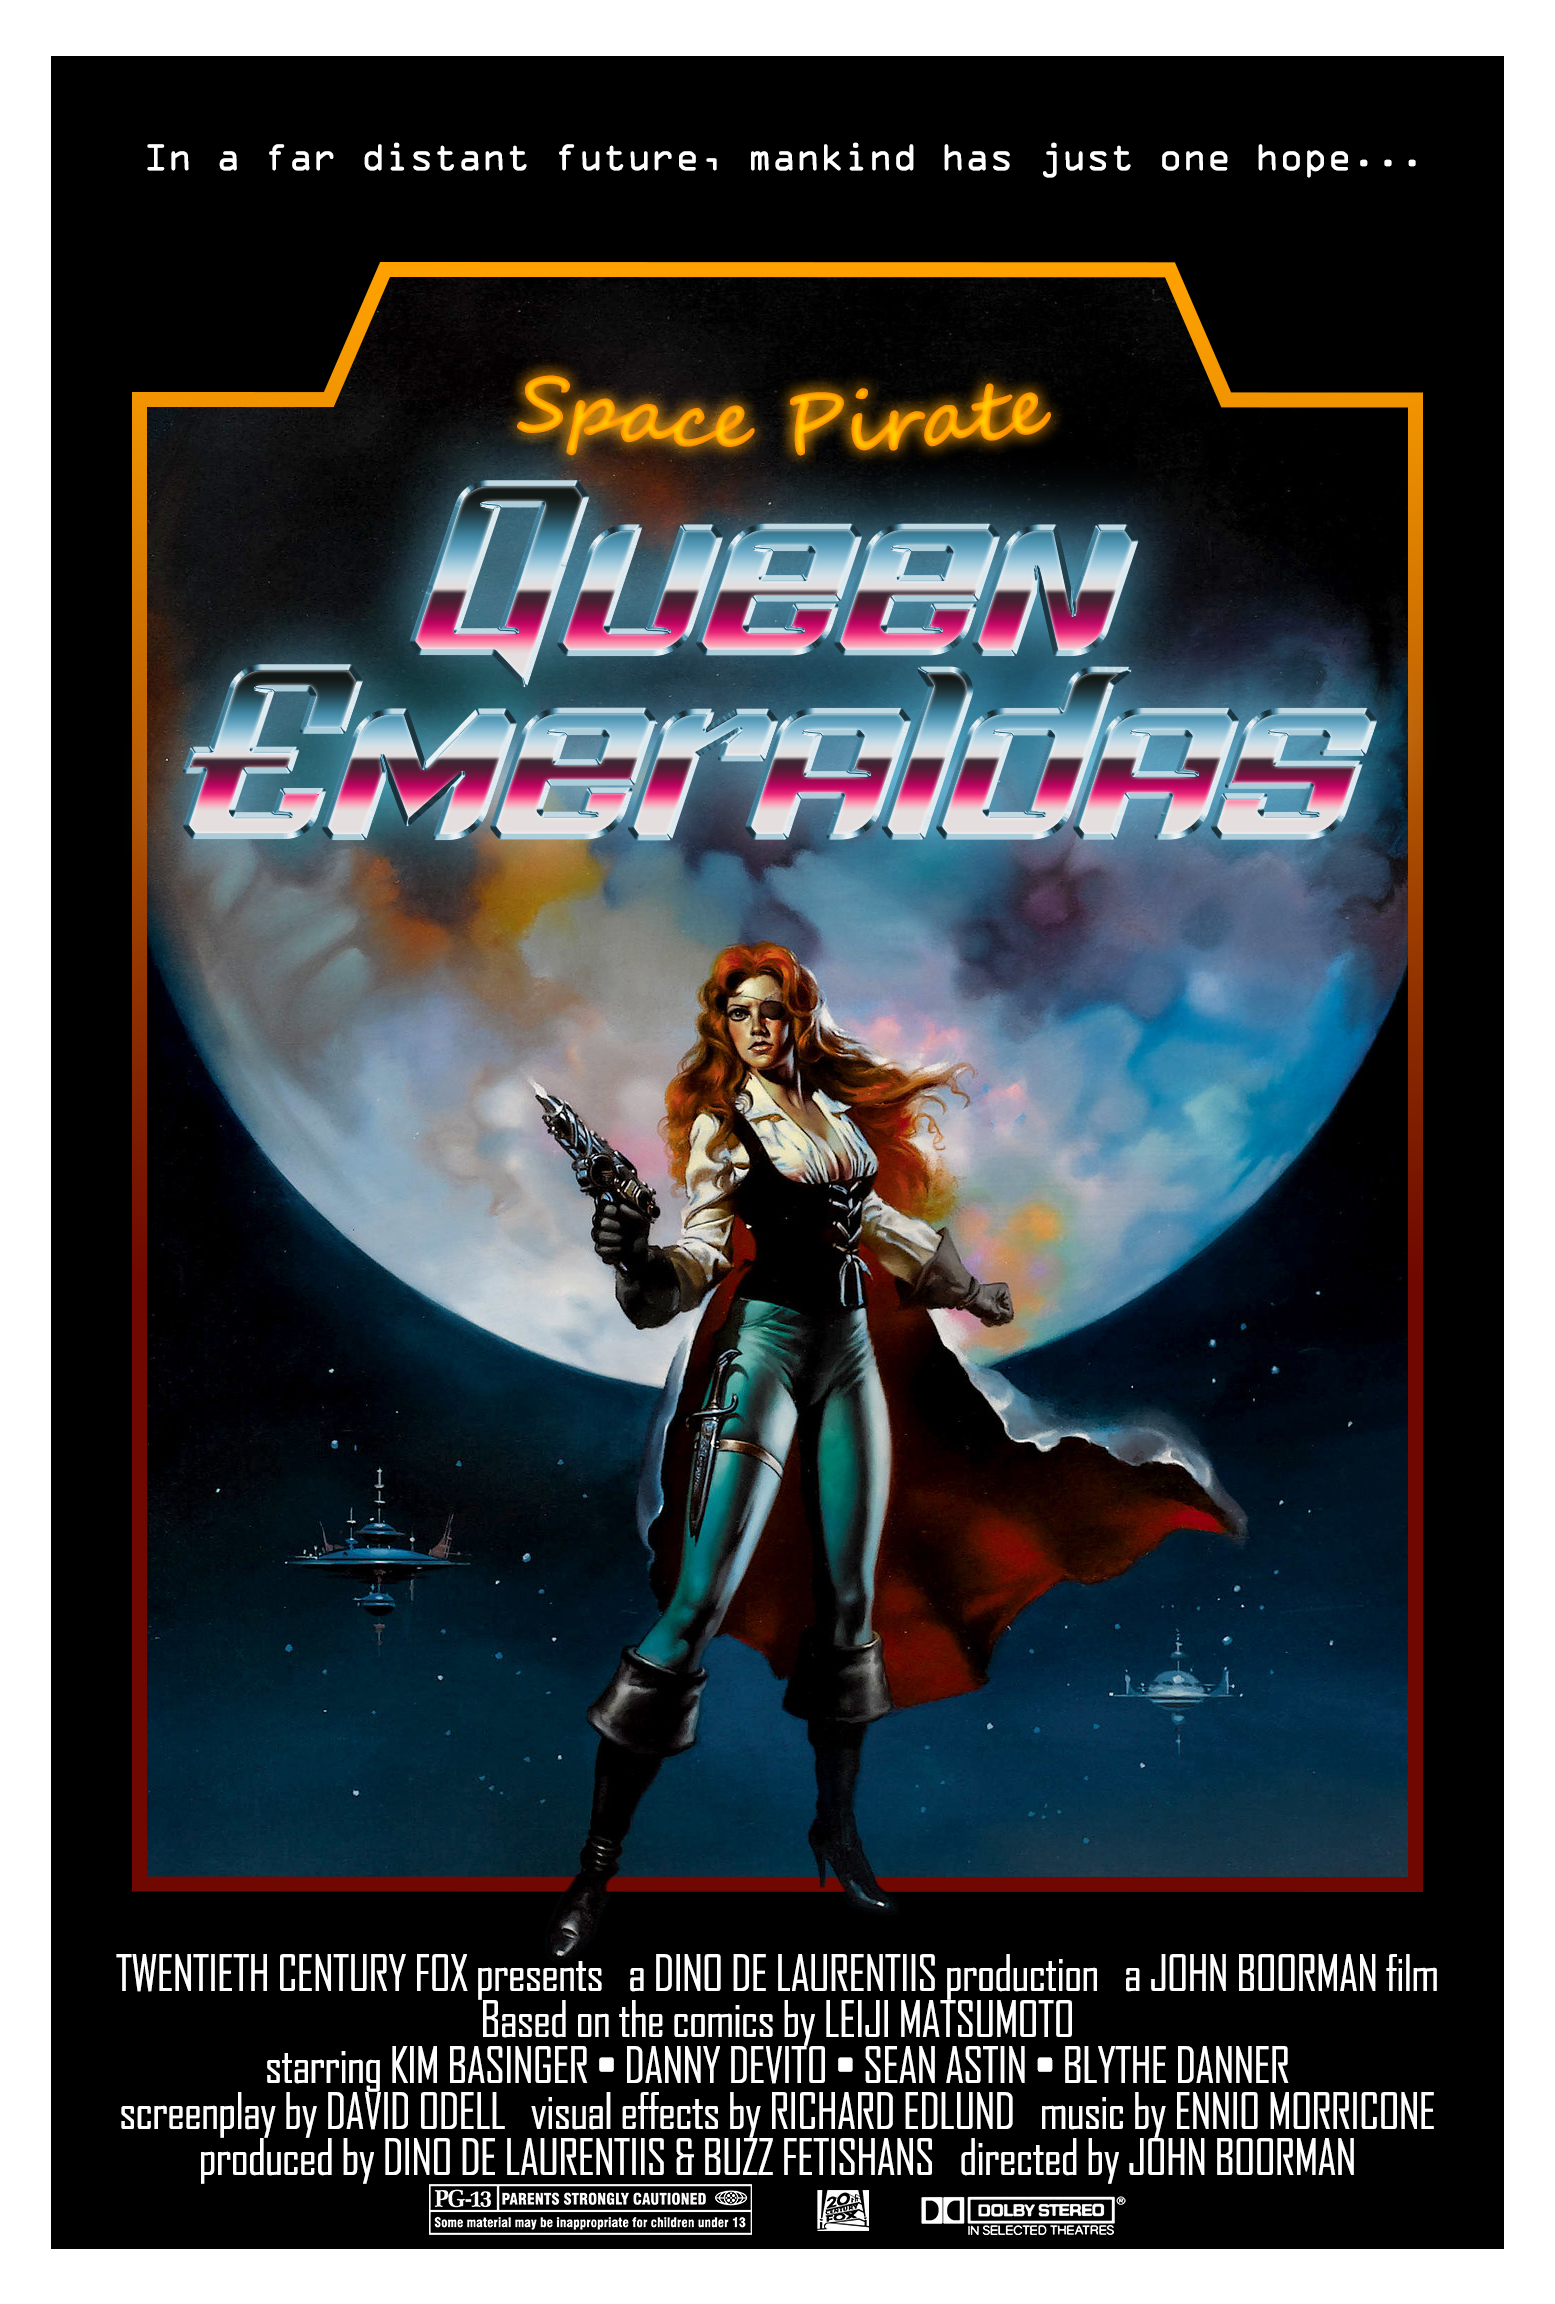
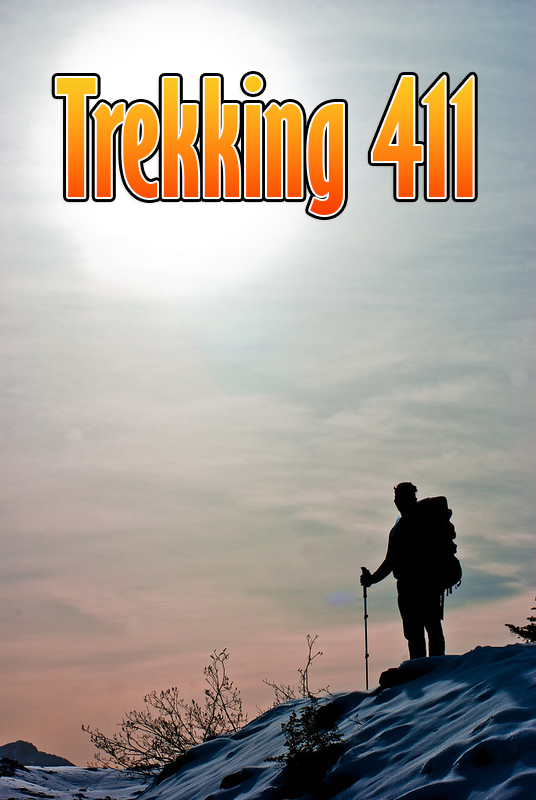
The assignment for this lab was to use the Text Tool and layer Blending Options to create a magazine cover. The specific requirements for this lab were to apply a gradient or pattern, and apply at least three layer styles.

I chose this image of a silhouetted hiker because there was a lot of open, uncluttered space at the top for text, and it was easy to read the silhouette was a hiker with a hiking pole and a backpack.

I chose yellow to orange for the gradient to mimic a setting sun, similar to what's shown in the photo, and to be reminiscent of the iconic yellow in National Geographic magazine. I did a black border around the text to make it clearer to read on the lighter background, similar to how modern subtitles in TV shows are done. The white text border was to further separate the colored text with the black border. If it were specified as a requirement, I would also have added a border frame, like National Geographic's yellow frame, as well as an issue number, cover lines, etc.

I went with "Trekking" in my title because I already had Lab 2-B finished and decided to stick with a loose theme, and "411" like dialing 4-1-1 for information; so "Trekking 411" would contain information about hiking.

Detailed Steps
  1. Open the original image file.
  2. In the top bar: Image > Image Size
  3. Keep Width/Height locked. Change units to pixels. Change Height to 800 px.
  4. Press T for the Text Tool. Click and drag over the top of the image and type Trekking 411.
  5. In the small box, change the font to "Gill Sans MT Ext Condensed Bold" and size to 150 pt.
  6. Press V for the Move Tool and move the text layer to center it (vertical purple line).
  7. Right click on the text layer in the layers window. Click Blending Options.
  8. On the left, click Gradient Overlay.
  9. Click the Gradient color box, select Oranges, select Orange_05. Click OK.
  10. Check the Reverse box. Scale to 110%.
  11. On the left, click Stroke.
  12. Change the Size to 2 px and Position to Outside. Change the Fill Color to white.
  13. On the left, click the plus sign next to Stroke to add another Stroke style.
  14. Change the size to 5 px and Position to Outside. Change the Fill Color to black.
  15. On the left, click Drop Shadow.
  16. Change the Opacity to 50% and Angle to 45°.
  17. In the top right, click OK to commit the 4 styles.
  18. Shift+Ctrl+S to Save As a Photoshop file (.psd).
  19. In the top bar: File > Export > Export As
  20. Change the format to JPG. Click Export.

— Gallery —